This article introduces how to set up an IKEv2 VPN tunnel from Vigor Router to the pfSense.
PfSense VPN Server Setup
1. On the pfSense VPN server, go to VPN >> IPsec, and click add P1 to create an IPsec VPN profile.

2. Edit the phase 1 settings as follows:
- Select IKEv2 for the Key Exchange version
- Select the WAN interface that pfSense accepts the VPN connections in
- Enter Vigor Router’s WAN IP as the Remote Gateway
- Give this VPN profile a Name in the Description field
- Select Mutual PSK for the Authentication Method
- Click Generate PreShared Key and copy it
- Select the Phase 1 proposal. We use the strongest Encryption Algorithm AES256 SHA256 DH Group 14 in this example. You may add other algorithms to suit the VPN peer’s proposal by the Add algorithm button if necessary.
- Enter the Phase 1 Key Life Time as 28800 seconds.
- In the Advanced Options, Select “None (Responder Only)” for the Child SA Start Action. It is the necessary setting to keep the IKEv2 connection stable with Vigor Router. Click Save to save the phase 1 settings.


3. Select the VPN profile we created and click the Add P2 button to configure the phase 2 setting.

- Select pfSense’s local network for Local Network
- Enter Vigor Router’s local network for Remote Network
- Select ESP as the Protocol
- Select AES 256bits/ SHA256 as the encryption Algorithms, PFS key group 14, and configure the phase 2 key Life Time as 86400 seconds
- In the Advanced IPsec Settings, find the Make before Break option and enable it. If this option is disabled, pfSense (strongswan) will disconnect the VPN connection while rekeying.


Vigor Router Setup
4. Go to VPN and Remote Access >> LAN to LAN, click on an available index number, and edit the profile as follows.
In Common Settings,
- Give it a profile name
- Check to Enable this profile
- Set Call Direction to "Dial-Out"
- At Dial-Out Through, select the WAN interface for VPN connection
- Select Always on
In Dial-Out Settings,
- Select IPsec Tunnel and IKEv2 as the VPN server protocol
- Enter pfSense’s WAN IP as the Server IP
- Enter the Pre-Shared Key the pfSense router configured for this VPN.
- Select AES256/G14/SHA256 as the encryption algorithm for both Phase 1 and Phase 2 proposals.

In IKE Advanced Settings,
- Configure Phase 2 Key Lifetime as 600 seconds
- Select to enable the Perfect Forward Secret option

In TCP/IP Network Settings,
- Enter Vigor Router’s LAN as the Local Network and pfSense’s LAN as the Remote Network
- Click OK to Save the settings.

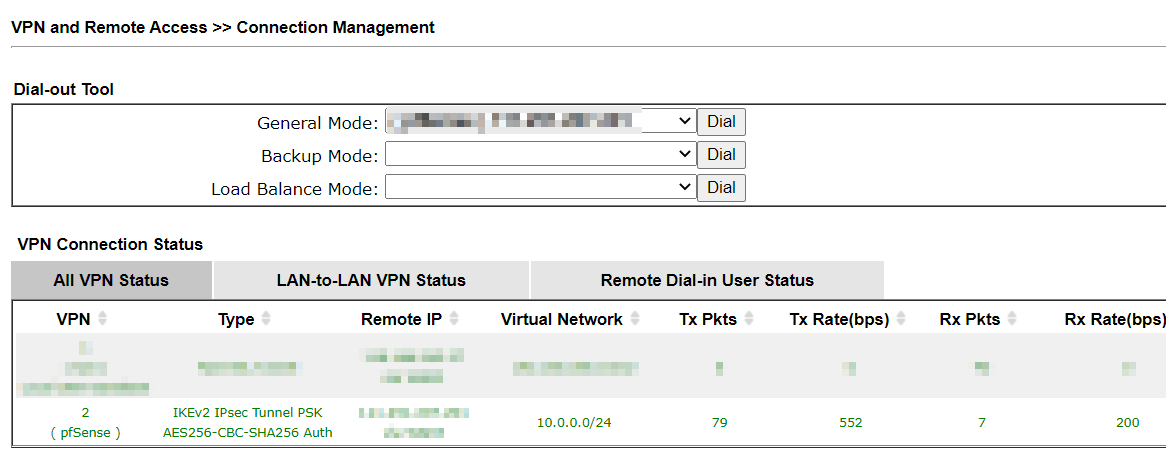
5. Go to VPN and Remote Access >> Connection Management page to check the VPN status.

Published On:2022-09-07
Was this helpful?
