
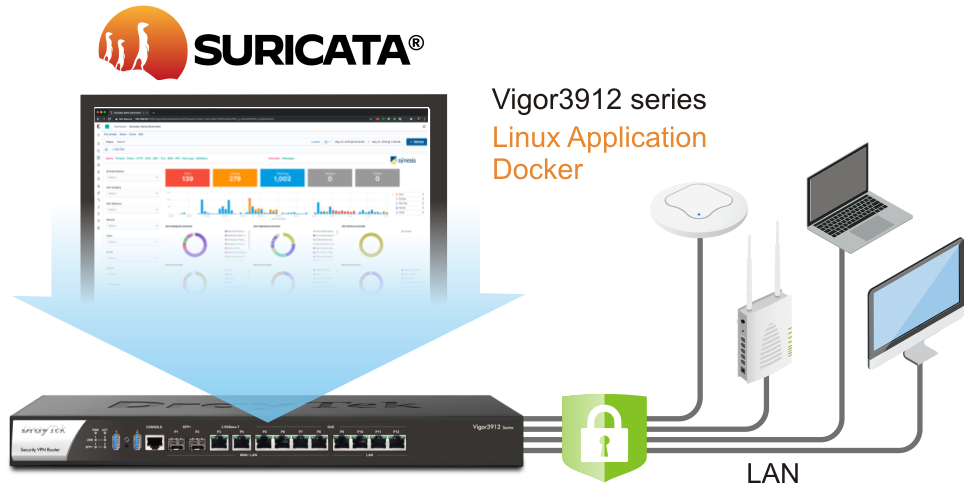
Running Suricata on your Vigor3912S
Suricata is an open-source threat detection software. It supports more than 60000 rules, including 6000+ CVE rules, and can detect and prevent a wide range of network threats, such as malware, network intrusions, denial-of-service attacks, and data breaches.
Vigor3912S supports Linux Applications with Docker, which can install this powerful software inside and use it to protect the network. This article will show how to use Suricata on a Vigor3912S.
Configuration
1. Ensure Vigor3912S can access the Internet before the setup.
2. Go to Linux Applications >> General Setup, enter the Linux IP address, Gateway IP address, select the LAN interface and tick to enable the Linux SSH service. The Linux IP address should be in the same LAN subnet as Vigor3912S.

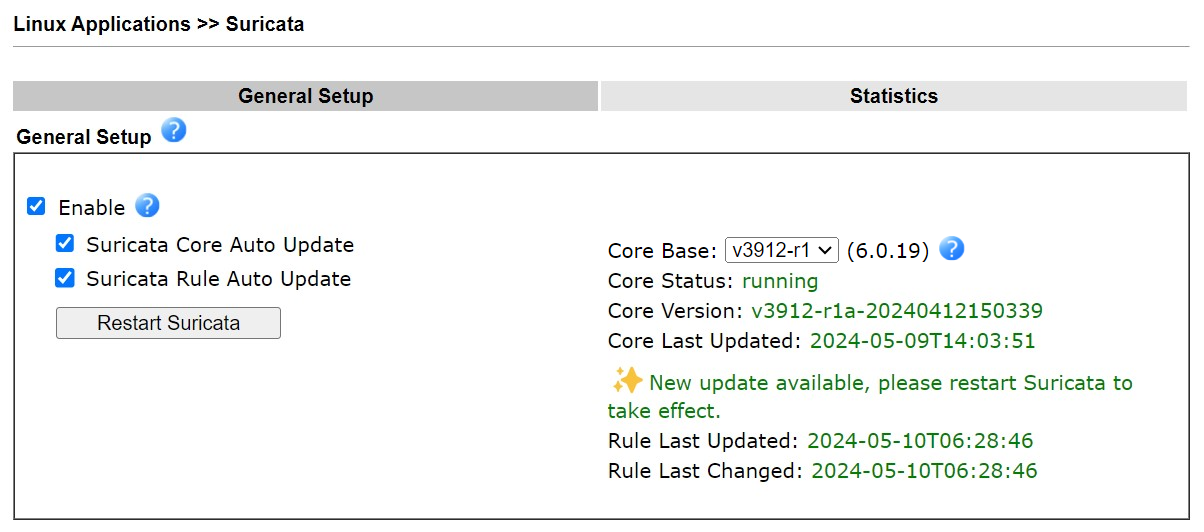
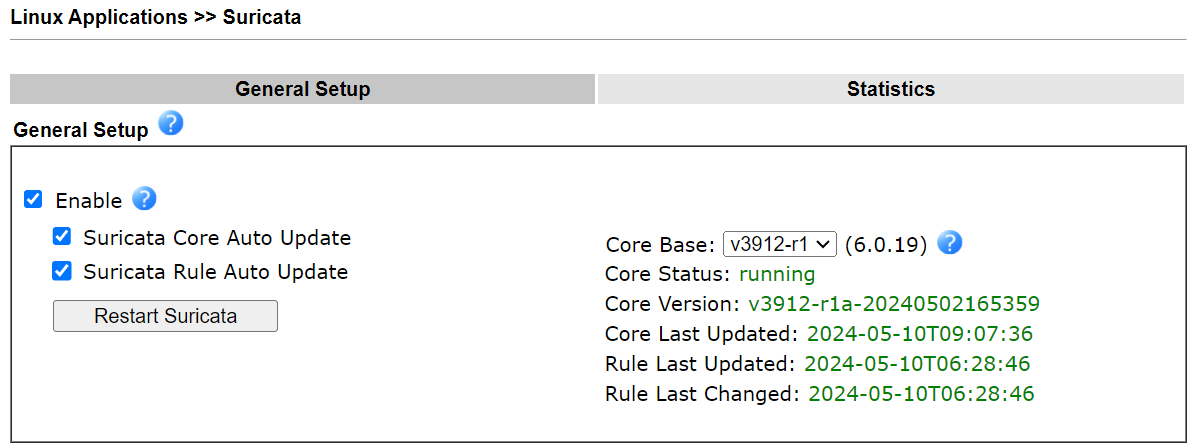
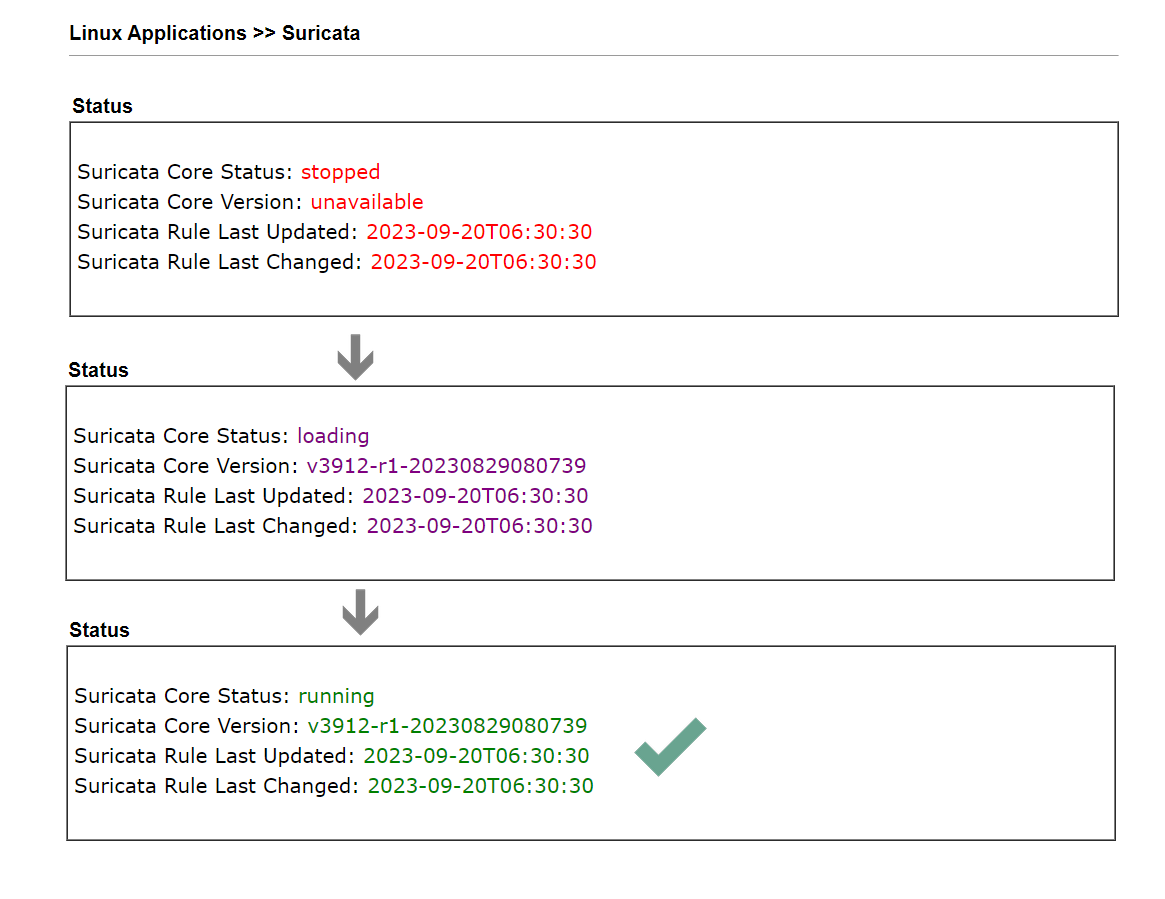
3.1. Go to Linux Applications >> Suricata, and check Enable to enable Suricata. The router will start downloading the Docker firmware image from the Internet. Wait for some minutes. When seeing the Suricata Core Status changed from unavailable to running, it means the Suricata installation is successful.
To keep the Suricata version be the latest one, it is recommended to enable the Suricata Core Auto Update and the Suricata Rule Auto Update options, then Vigor3912S will check if there is a new version daily, and make an update when available automatically.
Note that even the core image is not updated, it doesn't mean there are no updates for the Suricata rule. The core image has an SOP process to detect and update the rules.
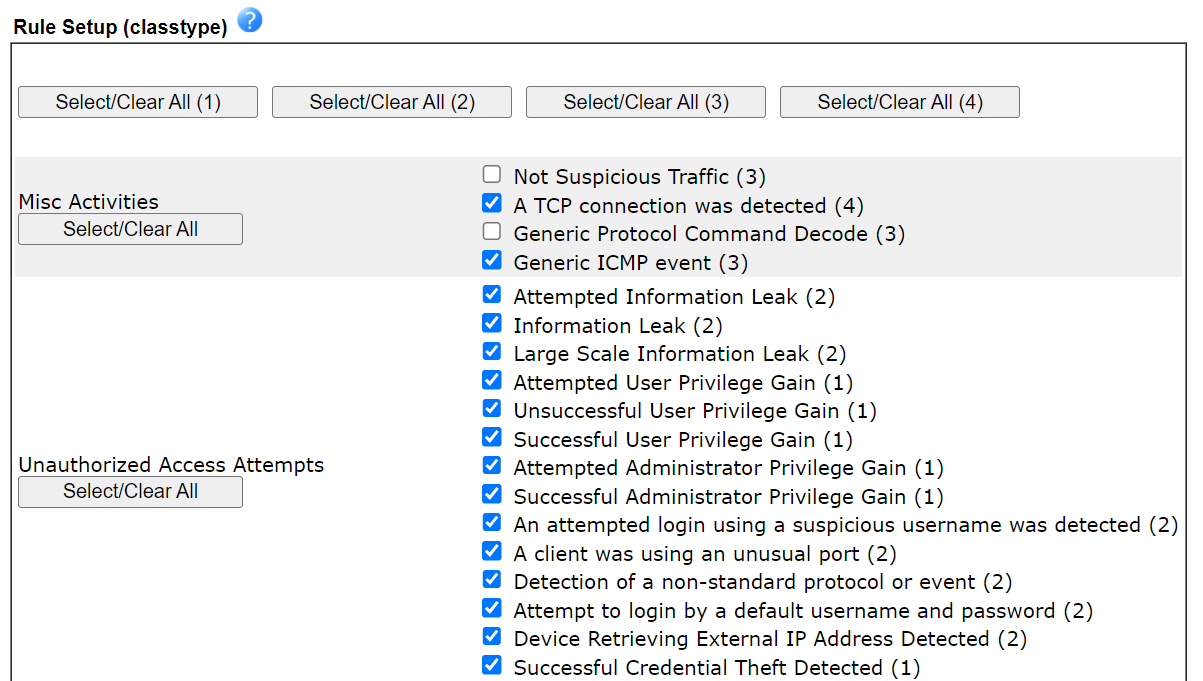
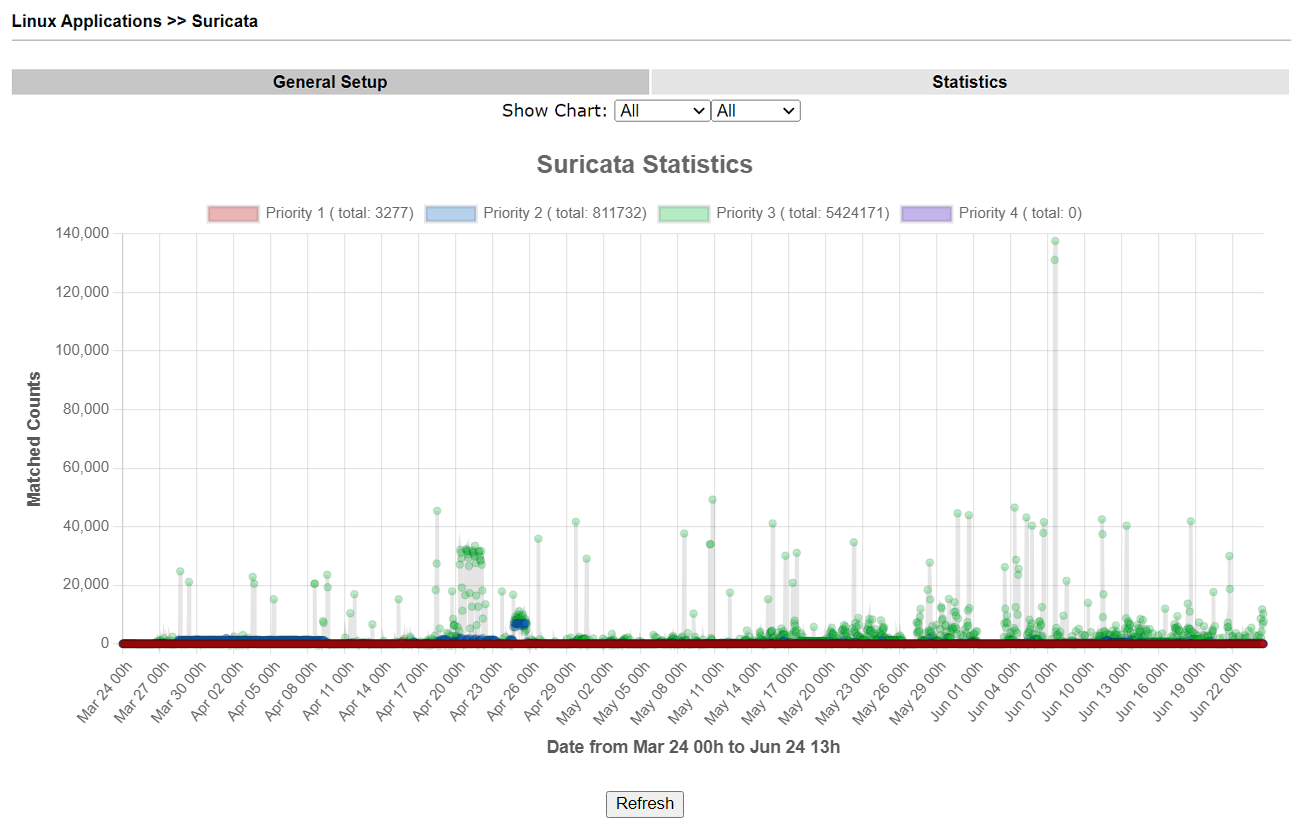
3.2.Suricata has over 60000 Suricata rules, including 6000+ CVE rules. The rules have 4 priority levels. We can select the rules with Priority by using the Select All (1)(2)(3)(4) button or the class rule options in Rule Setup (classtype). The number in the back of the class rule option is the priority. 1 means the highest priority.
4. After above setup, Suricata is running on Vigor3912S to detect the network activities. When the Suricata rule is changed, Vigor3912S will reload the Suricata service and it may take a few minutes to see the status changed from stopped, loading to running again.
Checking Logs
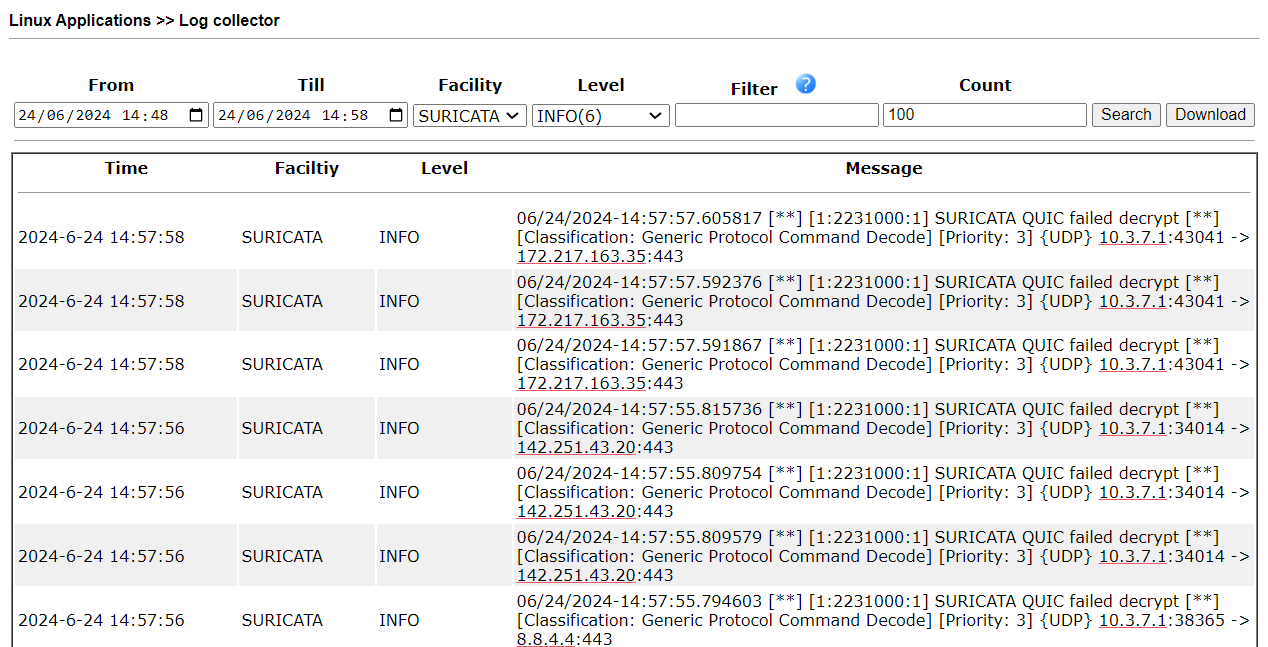
5. Go to Linux Applications >> Log Collector. Select the time range and SURICATA as the Facility to view the network events that SURICATA detected. The detected events may not all really the bad ones. We have to check which network event trigger the log and determine the further action. If the network event is the normal one, we can deselect the specific class rule from the Rule Setup.
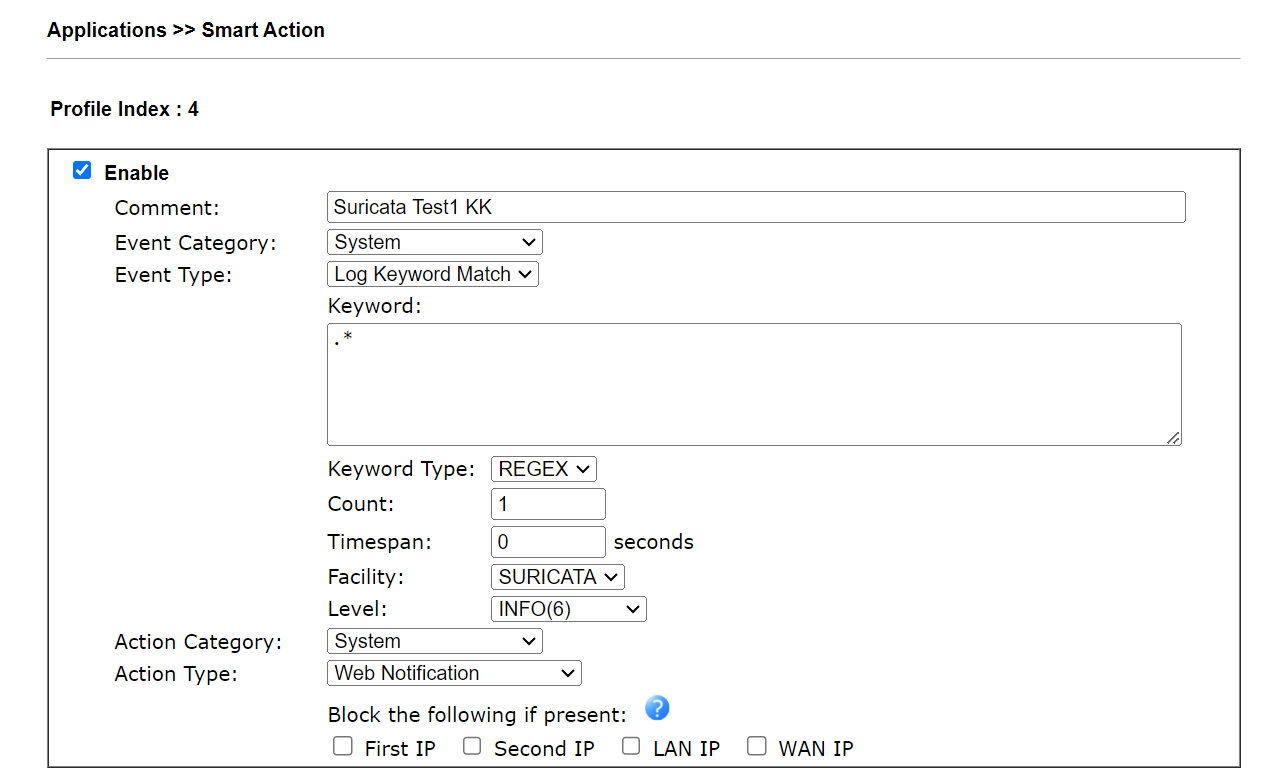
6. We can also Enable the Web Notification by Applications >> Smart Action to see the Suricata notifications.
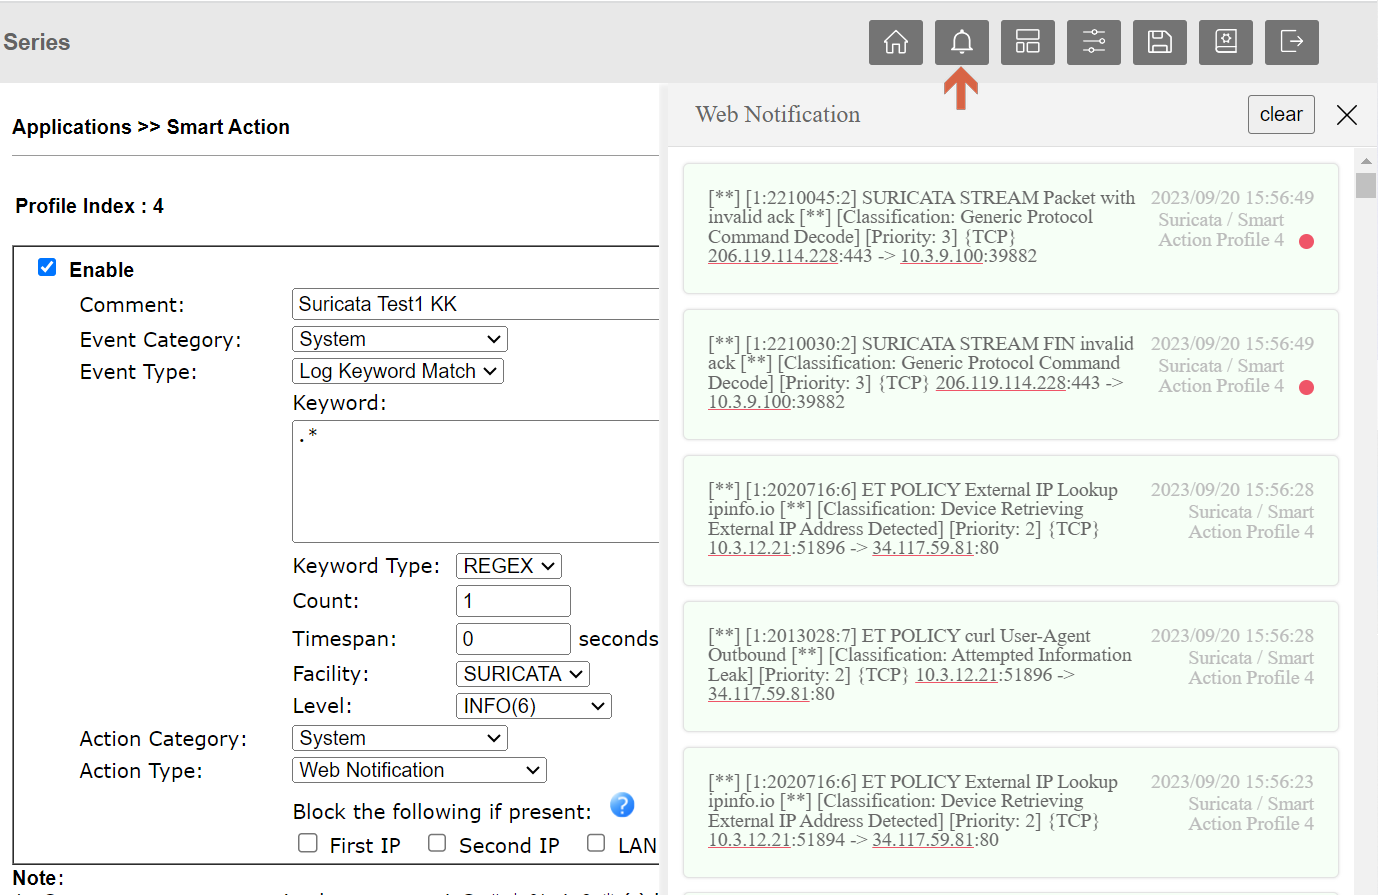
Then we can see the notifications by clicking the little bell icon on the router’s Web.
We can view all the Suricata rule matched counts in the network via the Statistics page.
Blocking
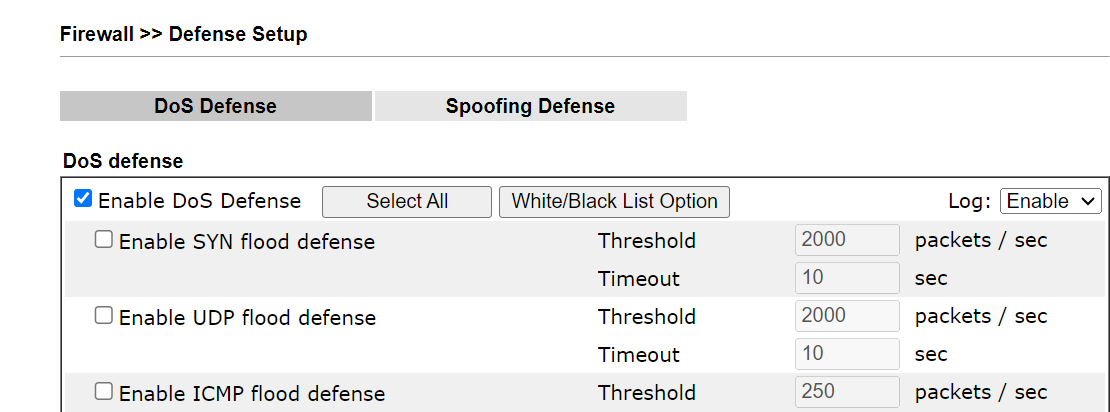
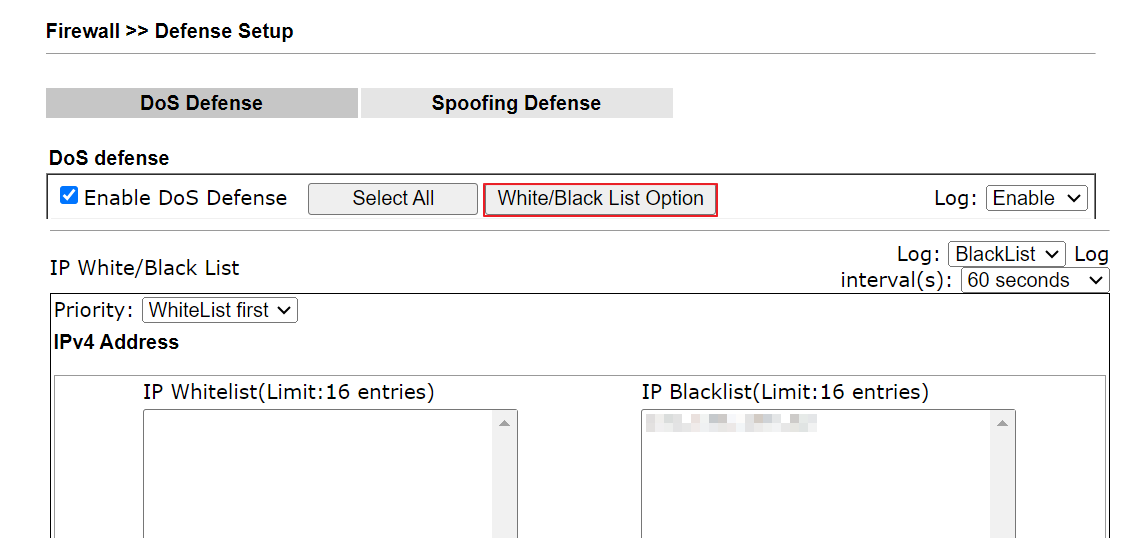
7. Select Enable DoS Defense, and click OK via Firewall >> DoS Defense. It is necessary to make the block work in the current firmware version (Vigor3912S will enable it automatically when Suricata runs in the future firmware version.)
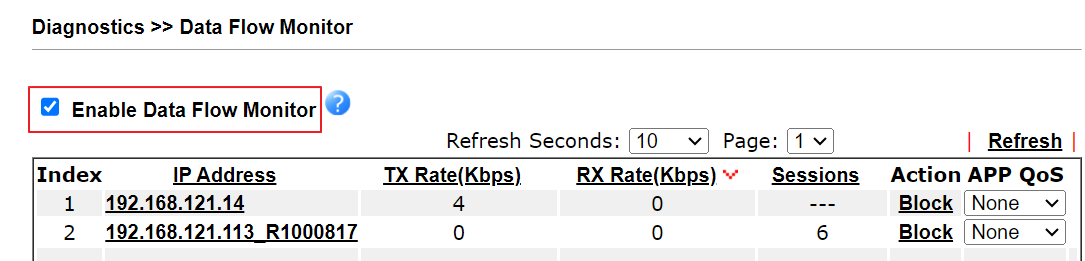
8. Select Enable Data Flow Monitor via Diagnostics >> Data Flow Monitor. It is necessary to make the block work in the current firmware version (Vigor3912S will enable it automatically when Suricata runs in the future firmware version.)
9. Suricata can detect network threats, and we can use the Smart Action profile to block IP that matches some keywords automatically and temporarily.
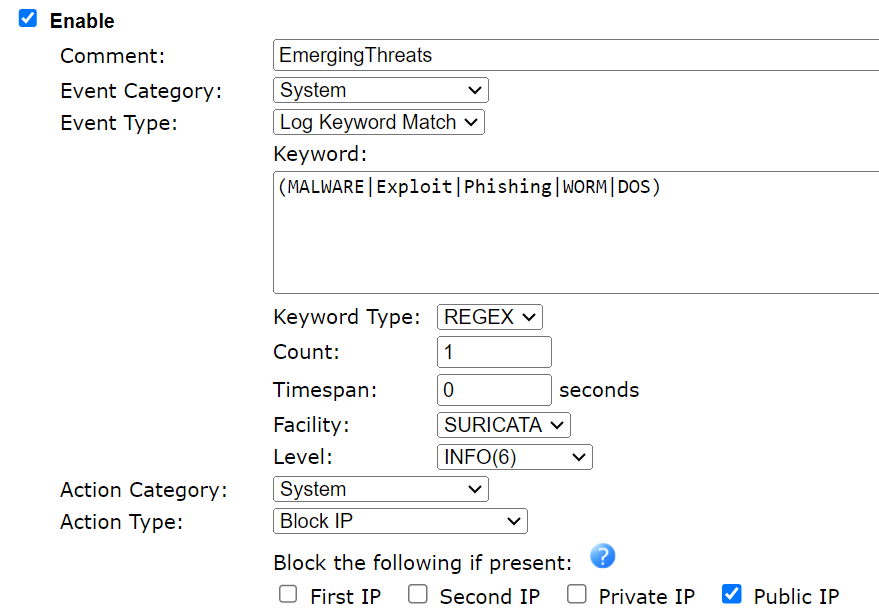
9.1 Example 1: Block the Public IP matched to keywords MALWARE, Exploit, Phishing, WORM or DOS. The keyword match is case insensitive.
Create a Smart Action profile via Applications >> Smart Action >> User Defined like the follows:
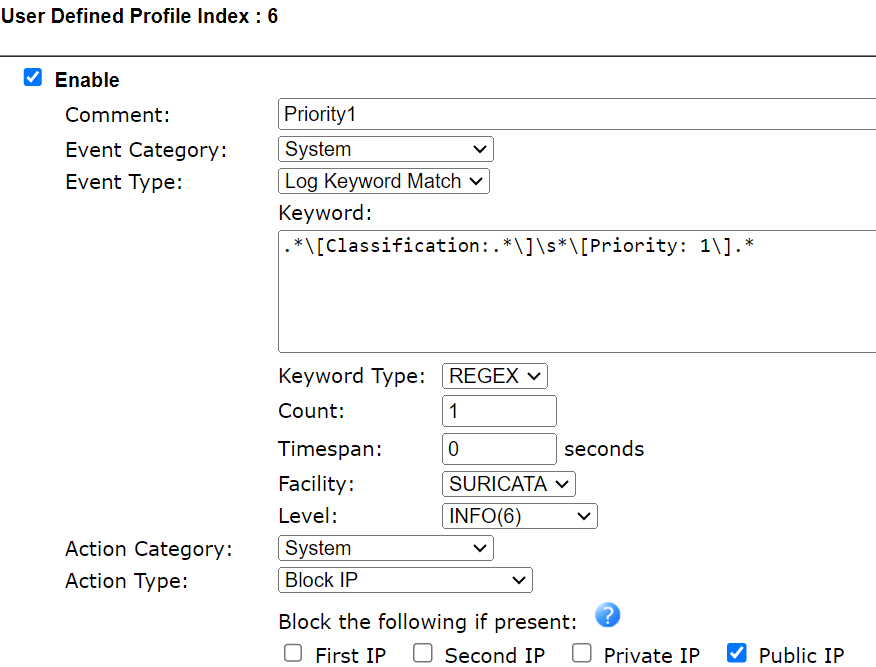
9.2 Example 2: Block the IP matched to the Priority 1 rules.
Create a Smart Action profile via Applications >> Smart Action >> User Defined like the follows:
10.We can also block the unknown IP temporarily and manually through Web Notification.
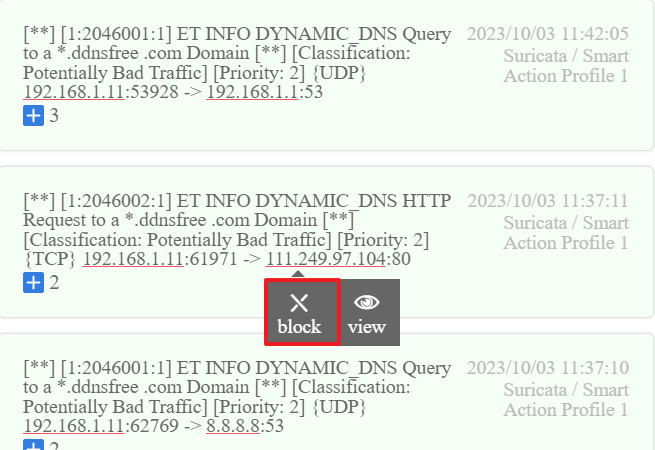
Then click View to check if the IP is added to the BFP table.
Checking the Block Logs
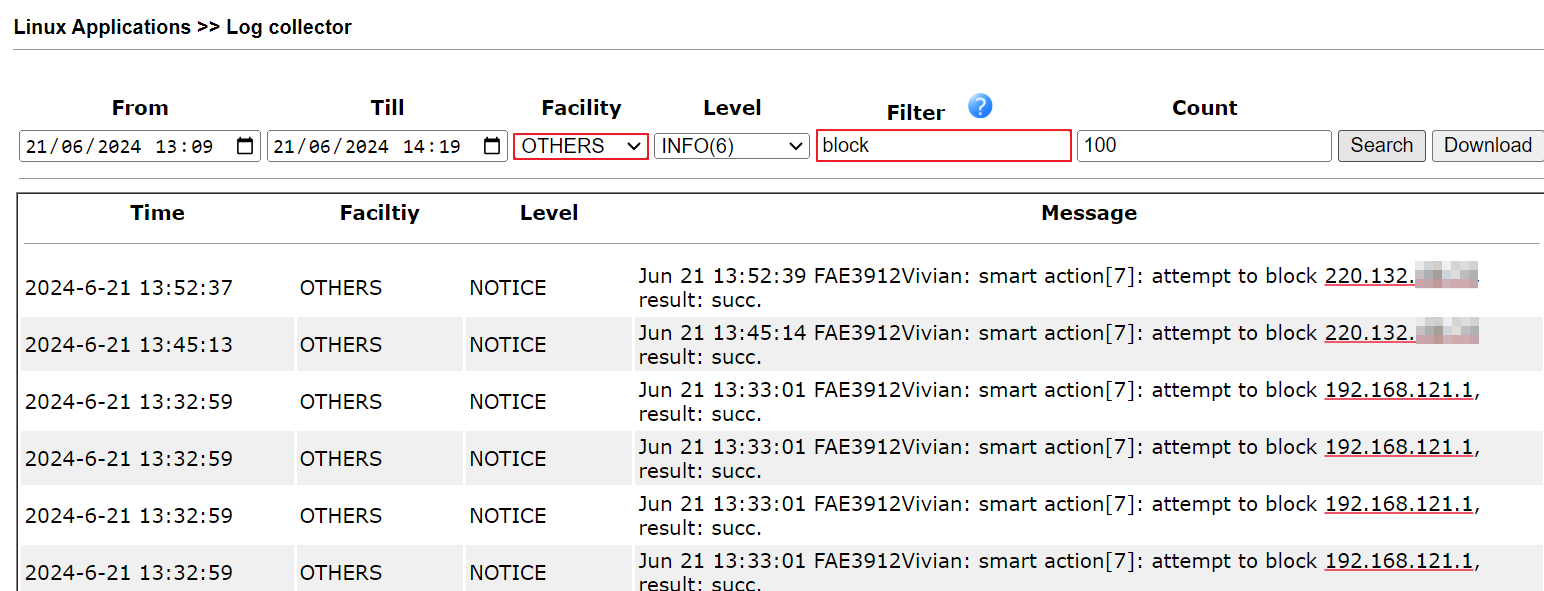
11.We can check if the AUTO Block action works or not via Linux Applications >> Log Collector.
11.1. Select a period, choose OTHERS facility, enter the keyword “block”, then click Search to check the block logs. The log "smart action[7]" means the block action is made by the smart action profile index 7. "result: succ" means the Block of the connection is successful.
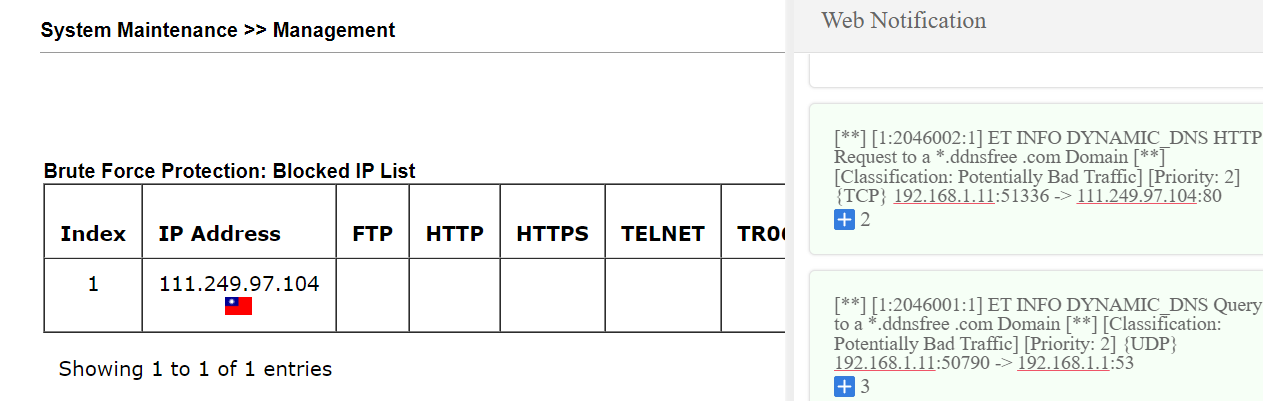
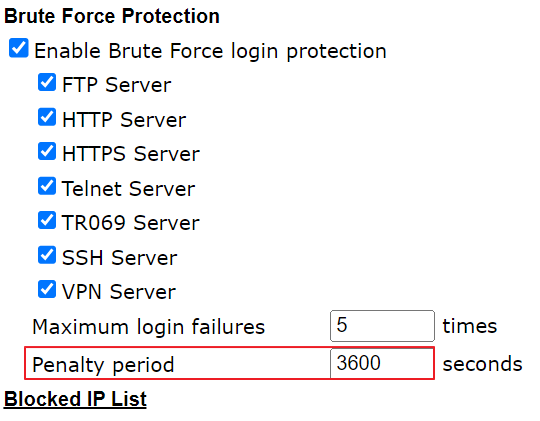
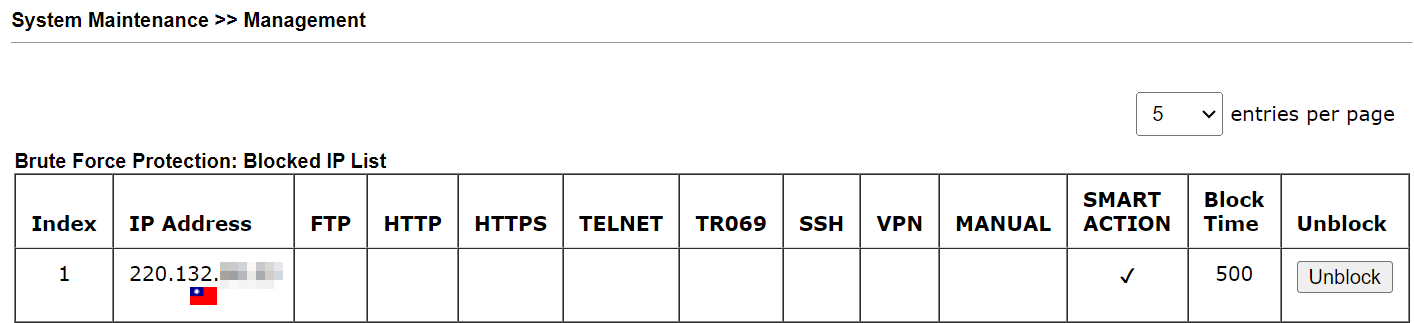
11.2. Go to System Maintenance >> Management >> Blocked IP List. The blocked IP will be displayed in the table. The Block Time is the same as the BFP Block Time.
11.3. Select the SURICATA facility, then search again to check what kind of threat is detected.

If the IP should not be blocked, we can unblock it from the Blocked IP List table.
If the IP should be blocked permanently, we can add the IP into the IP Blacklist via Firewall >> Defense Setup.
Published On:2024-06-26
Was this helpful?