
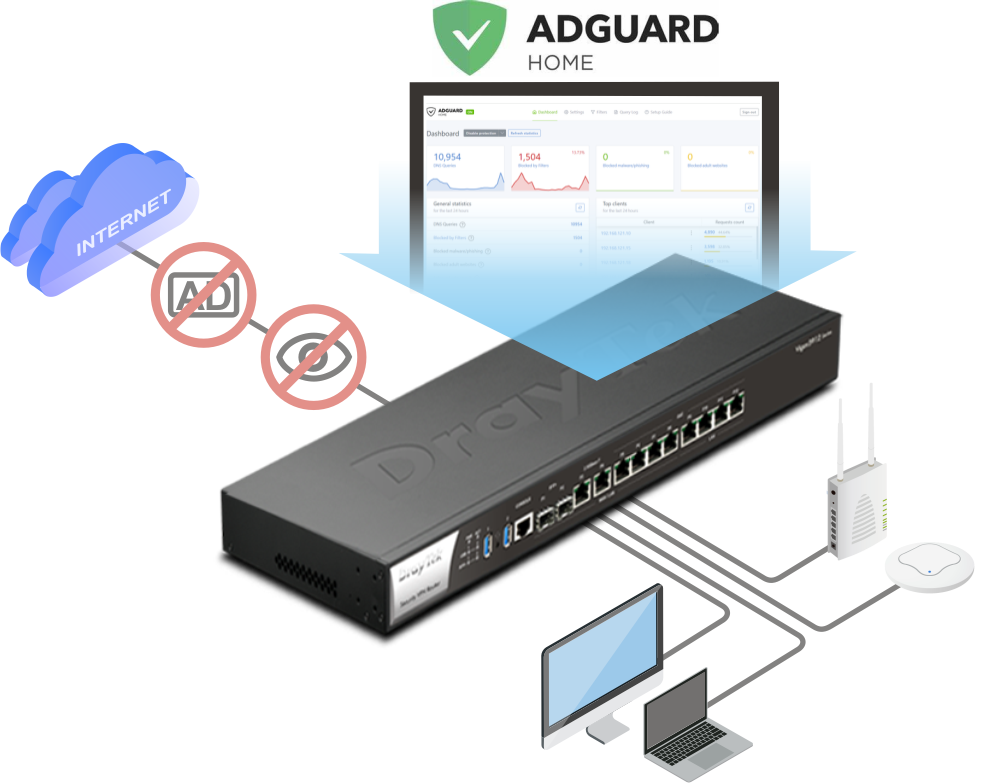
Enhance the Internet browsing privacy by installing AdGuard Home on your Vigor3912S
AdGuard Home is a network-level ad blocking and privacy protection software. Its primary functions include blocking ads, trackers, and other unwanted content. AdGuard Home operates by being set as the DNS server for your network. When devices browse the web or use apps, all DNS requests are routed through AdGuard Home, which checks and filters out domains associated with ads, tracking, or malicious content. This ensures that users won't see ads while browsing and can avoid being tracked.
By installing AdGuard Home and using it as the DNS server on the Vigor3912S, users can browse the Internet with enhanced privacy and reduced ad interference. This article will show you how to use AdGuard Home on a Vigor3912S.
Support Models: Vigor3912S fw 4.3.6.1
Configuration
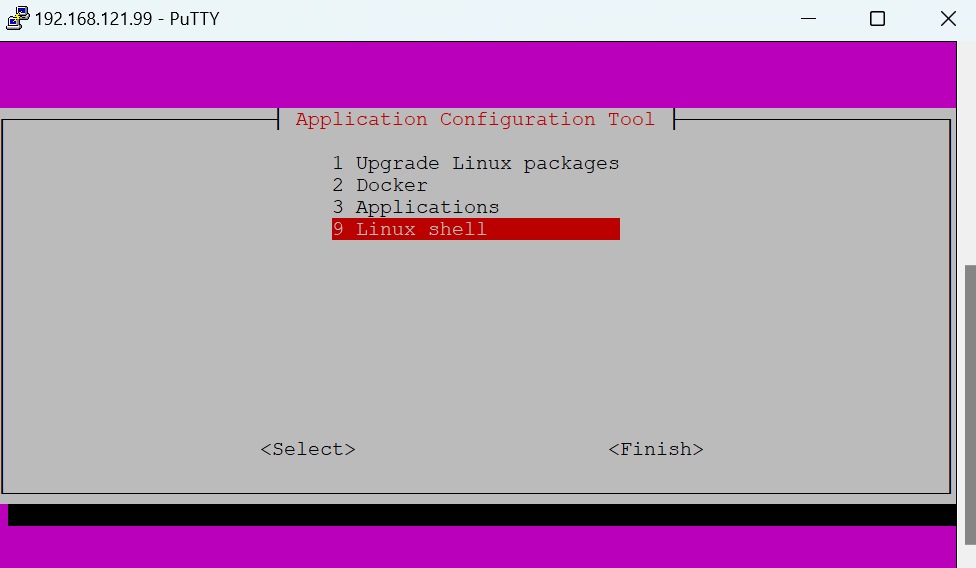
1.SSH into Vigor3912S and select Linux Shell.
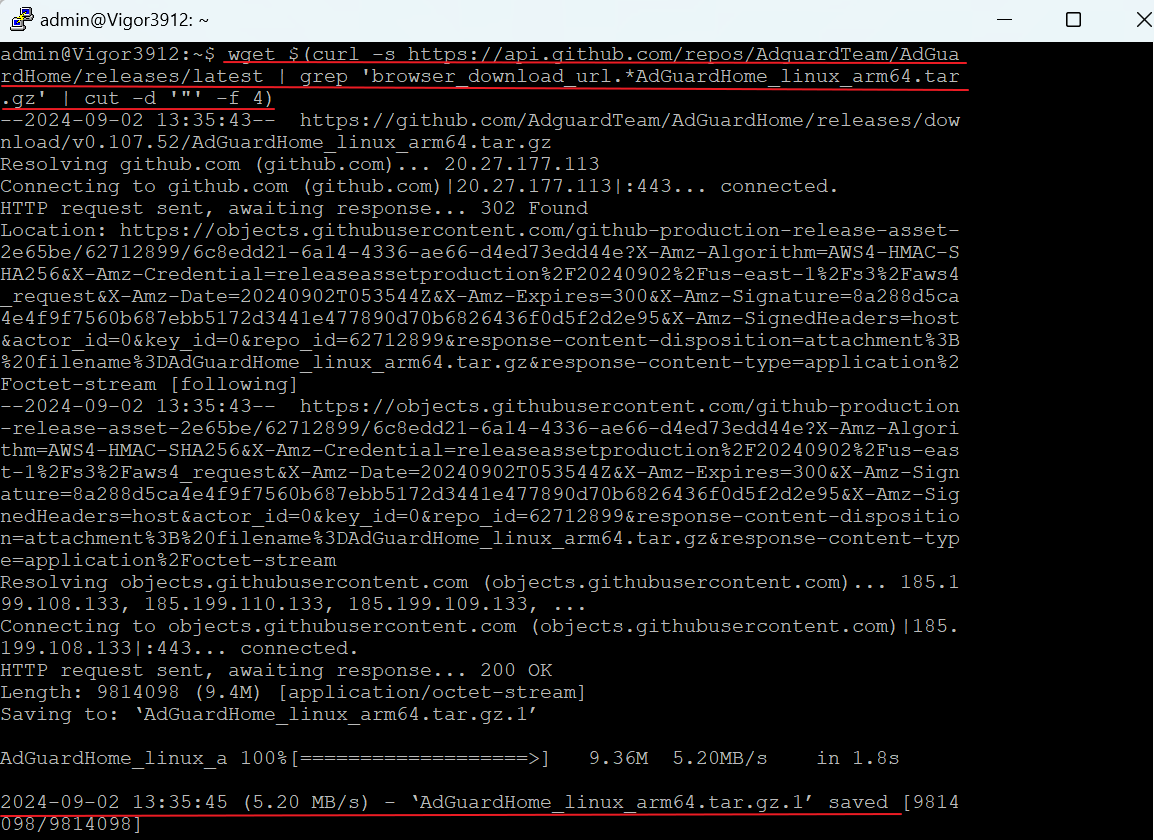
2. Download AdguardHome latest version.
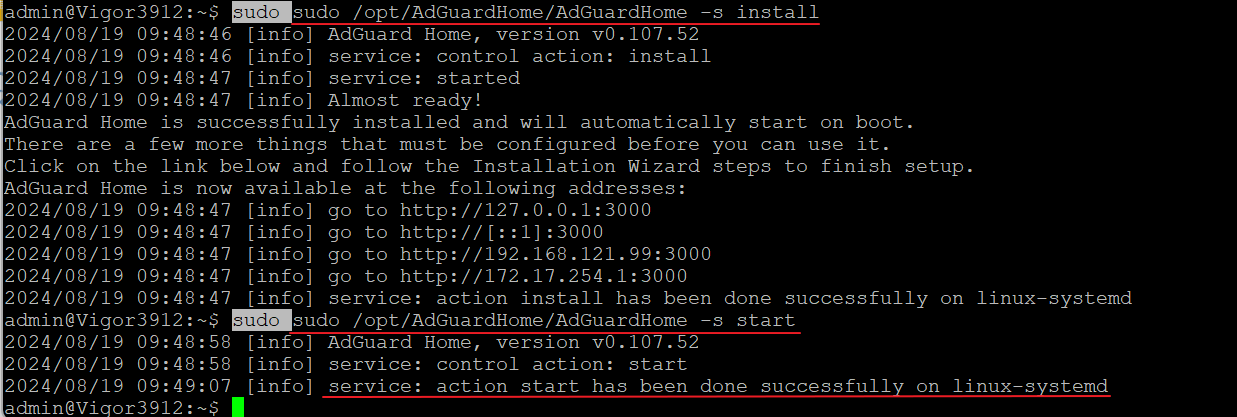
3. Extract, Change the Service Port if Needed, Install, and Start the Service.
Note: AdGuard uses TCP Port 3000 by default, just like VigorConnect. If the Vigor3912S has VigorConnect installed, please change the service port before installation. In the steps below, we changed the AdGuard port to 3912.
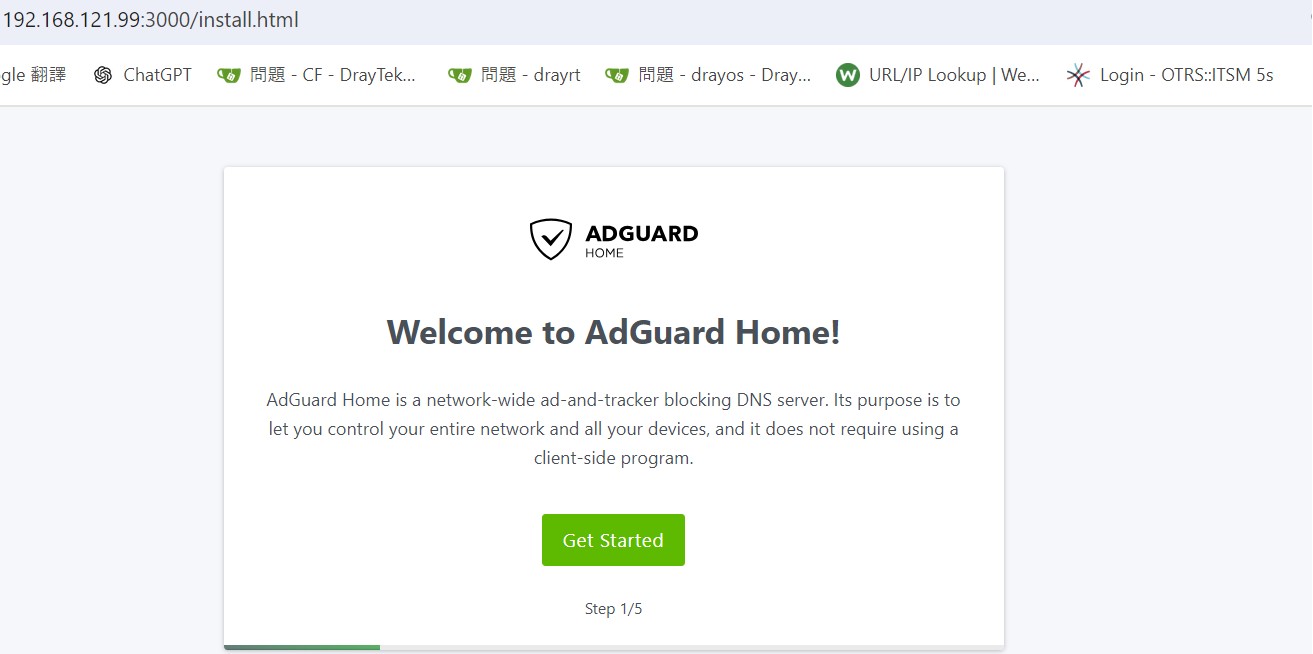
4. Access the Web Interface and Configure AdGuard Home Open a web browser and go to http://Linux_IP_Address:3000 or http://Linux_IP_Address:3912 , the new service port configured in step 3 to access the AdGuard Home web interface. Follow the setup wizard to configure AdGuard Home according to your needs.
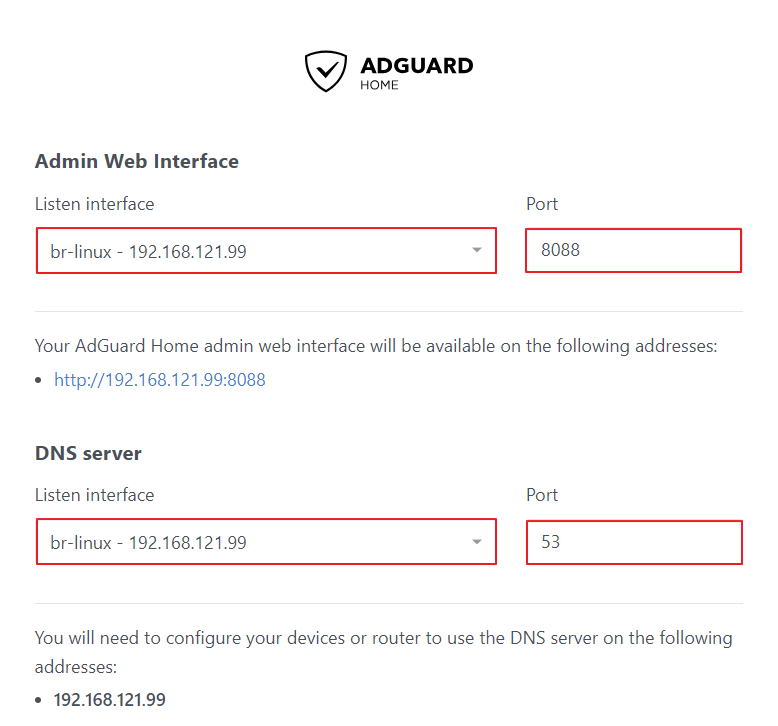
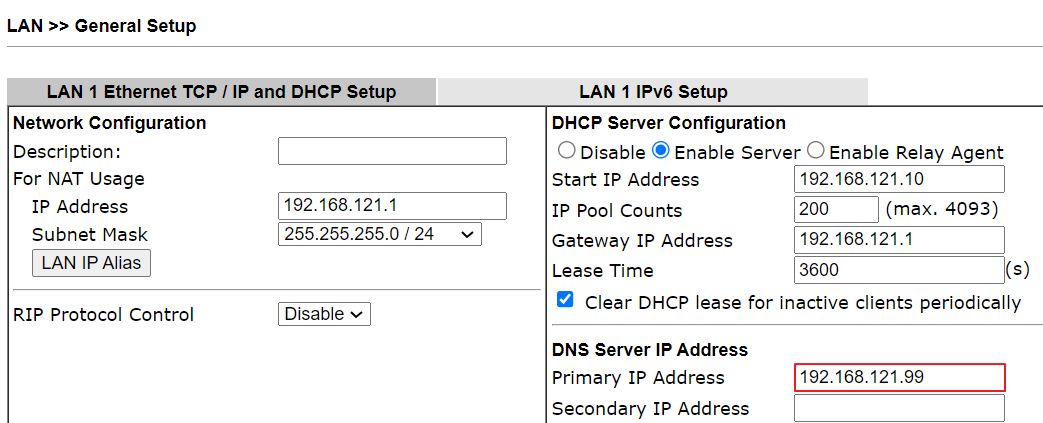
5. Configure AdGuard Home server’s IP as the DNS server IP on the Network.
6. Reboot the router to force the DHCP clients get and use the new AdGuard DNS server IP. If rebooting isn't convenient, manually releasing and renewing the IP address on each client device can achieve the same result.
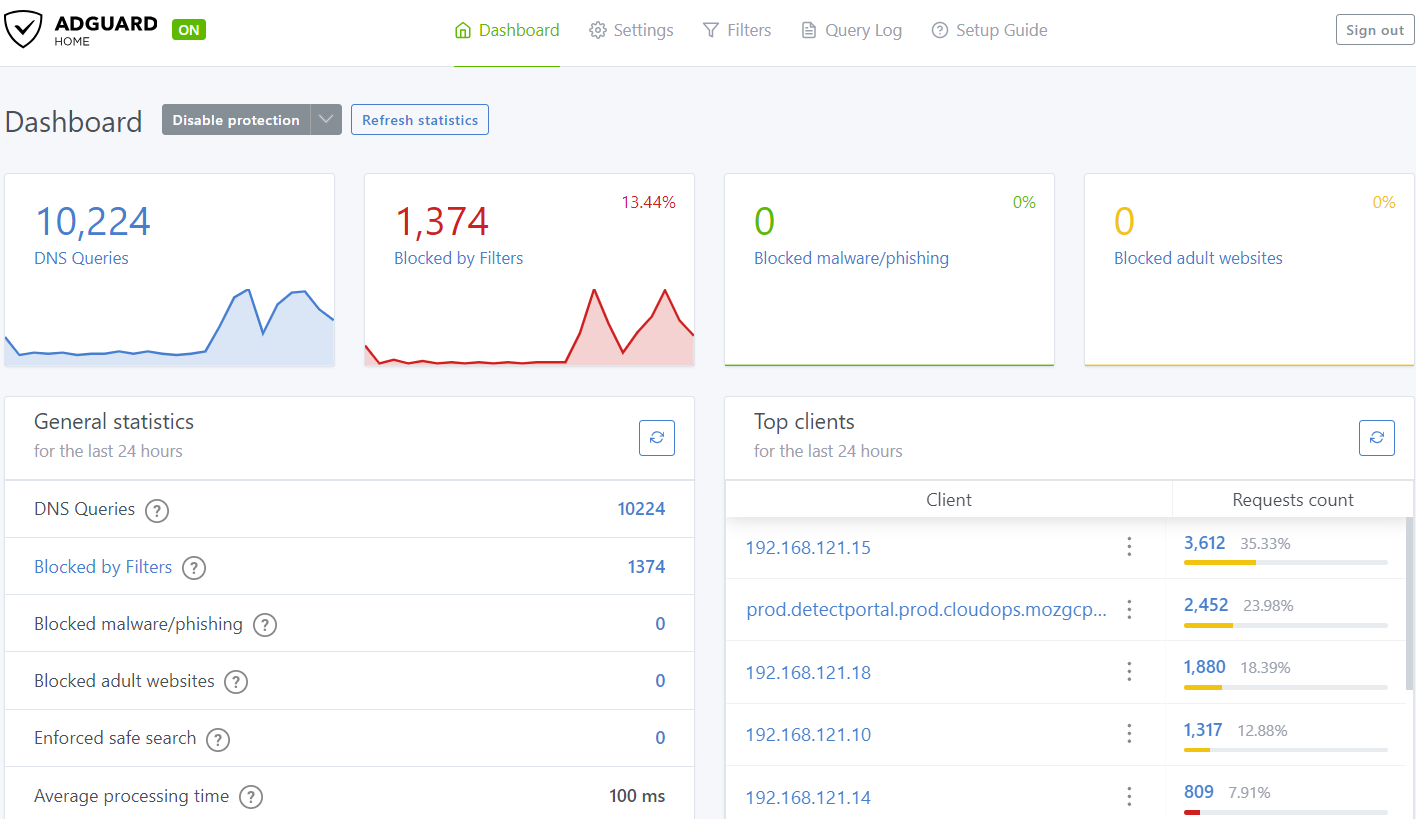
7. Go to AdGuard server’s Web UI by http://192.168.121.99:8088. The dashboard shows information, including the handled DNS queries, the Blocked DNS queries, the Top clients’ list and the requests counts.
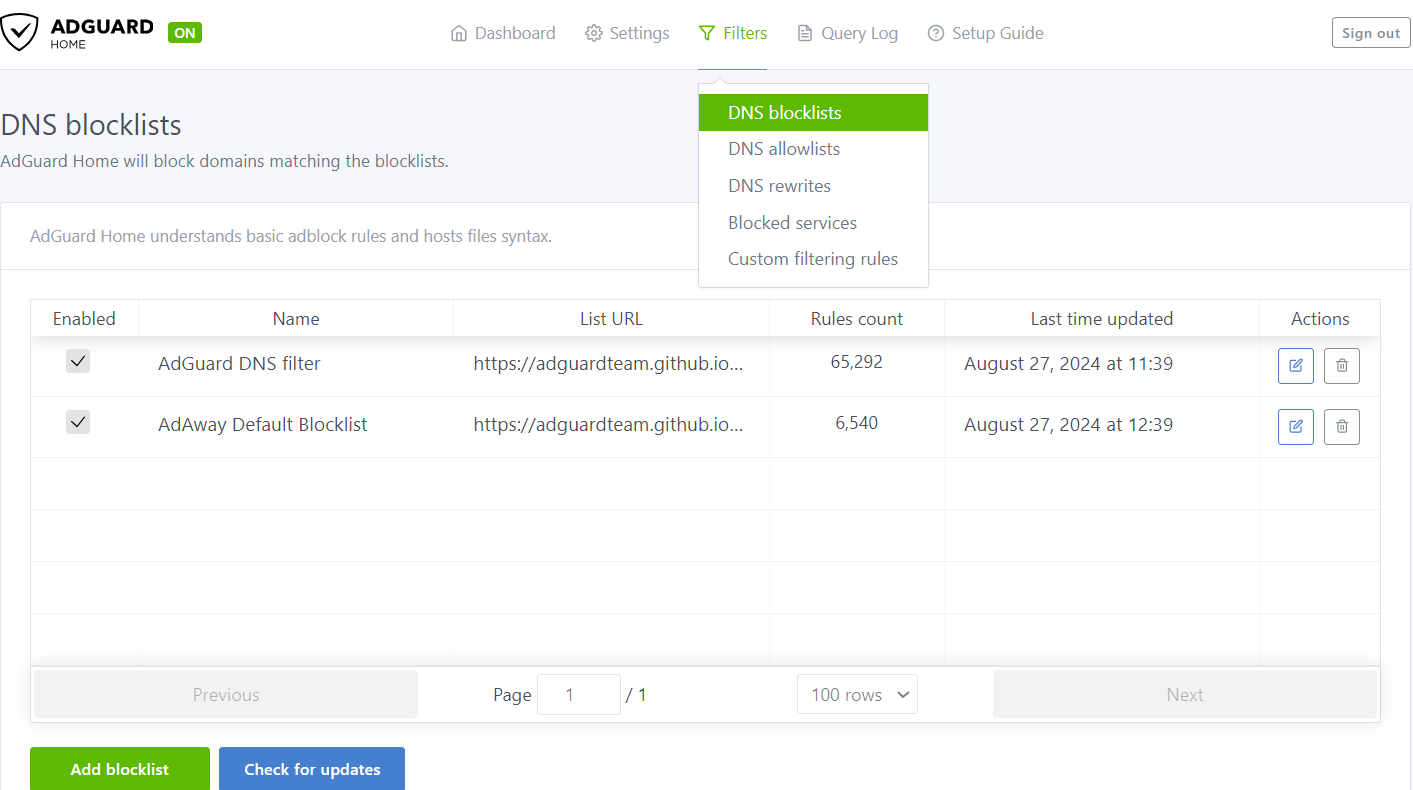
8. AdGuard has the default DNS allowlist and the blocklist. Add a new blocklist if needed via Filter >> DNS blocklist.
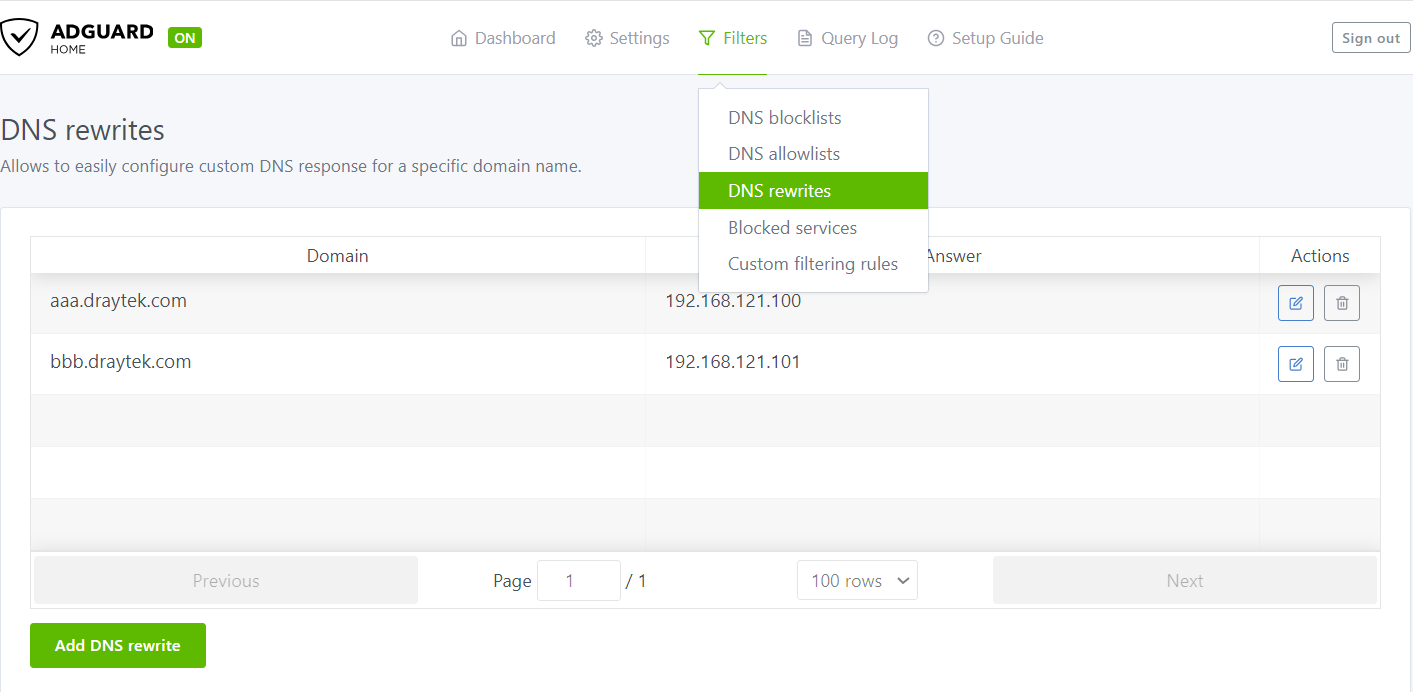
9. It is also possible to add custom DNS replies for specific or internal Domains via DNS Rewrites.
Published On:2024-09-09
Was this helpful?