Vigor Router provides internal RADIUS server. This document introduces how to set up Vigor Router to be a RADIUS server and use it as the authentication server for 802.1x authentication.

1. Create user profiles: Go to User Management >> User Profile, click on an available profile index, enable this profile, enter Username and Password.

2. At Internal Services, check Internal RADIUS, so that this profile can be used for RADIUS clients. Then, click OK to save.

3. Enable internal RADIUS: Go to Applications >> RADIUS/TACACS+ >> Internal RADIUS,
- Enable Internal RADIUS
- In RADIUS Client Access List, enable an index, enter Shared Secret, and enter the IP Address and Mask which is allowed to access Vigor Router as RADIUS client. (Tips: If there are more than 4 RADIUS clients, set a larger subnet mask to over more IP addresses of RADIUS clients.)
- Click OK to save and reboot the router.

(Optional)4. User Profile area shows all the user profiles stored on the router. The profiles in Authentication List are the profiles that have "RADIUS" enabled and which RADIUS client can use, such as the profile created in step 1. The profiles in Available List are the user profiles that don't have "RADIUS" enabled. If you would like RADIUS client to use those profiles, you may select the available profiles then click ">>" to put them into Authentication List.

5. RADIUS client setup: For the 802.1X authenticator which would like to use Vigor Router as RADIUS server, need to enter the IP address of Vigor Router and Shared Secret set in step 2.

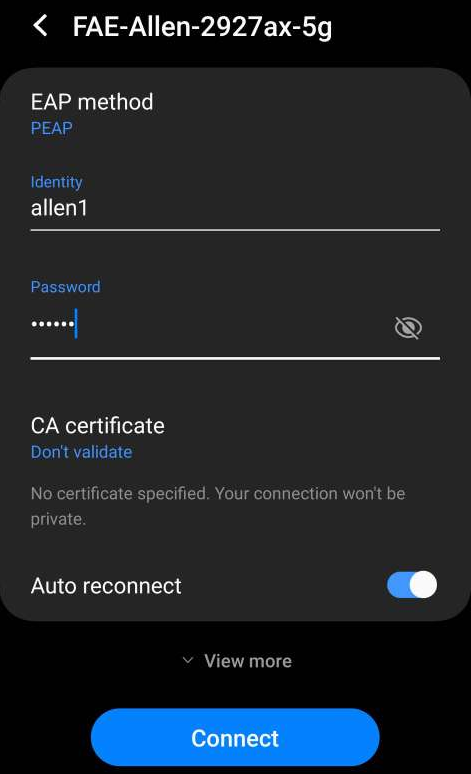
6. After the steps above, when client devices connect to the RADIUS client (the authenticator) and attempt to join the network, they can log in with the credentials set in step1.

7. From Diagnostics >> Authentication Information, the network administrator may check each user's last successful authentication and failed attempts.

Troubleshooting
If the client devices failed to join the network, and the Syslog shows "RADIUS SRV: Invalid Message- Authenticator from [Radius Client IP]", it might because that the shared secret of client and server do not match.

Vigor Routers come with an internal RADIUS server. This document explains how to set up Vigor2136 as a RADIUS server and use it for 802.1x authentication.
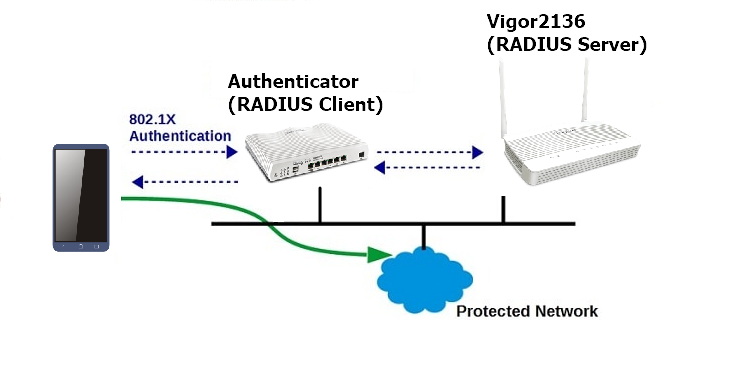
RADIUS Server Setup
1. Go to IAM / Users & Groups to create a user for 802.1X authentication.
- Click on + Add to add a new user.
- Enter a username and password.
- Select the role of the user.

2. Go to Configuration / RADIUS/ TACACS+ / Internal RADIUS menu page.
- Enable Internal RADIUS.
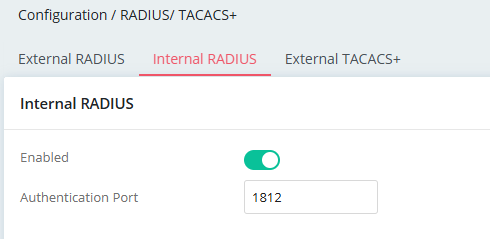
RADIUS Client Access List Settings
- Click Add to add a RADIUS client.
- Enter the shared secret, IP address, and mask for the RADIUS client.

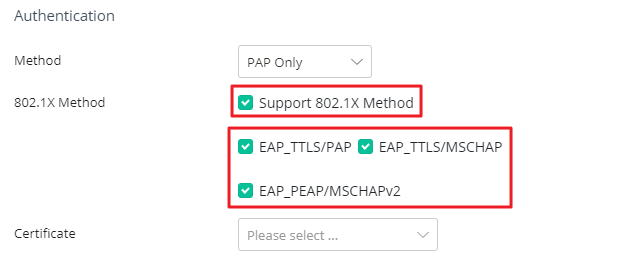
Authentication Settings
- Select Support 802.1X Method.
- Select the method allowed to be used for the RADIUS client.
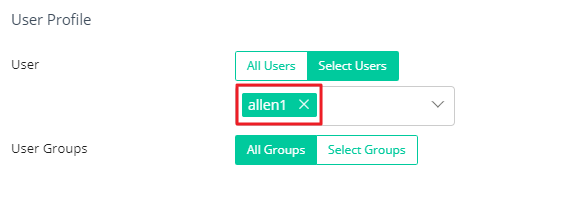
User Profile Settings
- Click on Select Users.
- Select the user created in step 1 from the pulldown list.
Click Apply to save the settings.
RADIUS Client Setup
At the RADIUS client side, enter the IP address and port of the RADIUS server and the shared secret for this RADIUS client.

802.1X Authentication
After the steps above, when client devices connect to the RADIUS client (the authenticator) and attempt to join the network, they can log in with the credentials set in step 1.
Published On: 2018-04-01
Was this helpful?
